Active@ Partition Recovery is a data recovery utility that you can use to:
This means that you can recover deleted or damaged partitions located on data volumes (D:, E:, and so on), attached hard drives, as well as on the external USB drives and Memory Cards (SunDisk, MemoryStick, CompactFlash, etc.).
On a system partition, BOOT.INI is corrected automatically (if required) in order to repair an un-bootable system. Boot Sectors on the damaged volume are also being corrected in order to maintain the integrity of the partition. This utility also enables you to fix a damaged MBR and to delete invalid partitions.
DO NOT WRITE ANYTHING ONTO THE DRIVE THAT CONTAINS YOUR IMPORTANT DELETED DATA!
When you install software, you write data onto the disk which can destroy your deleted data. If you have only one logical drive, physically remove the hard drive from the computer and install it as a secondary logical drive on another computer where data recovery may be possible.
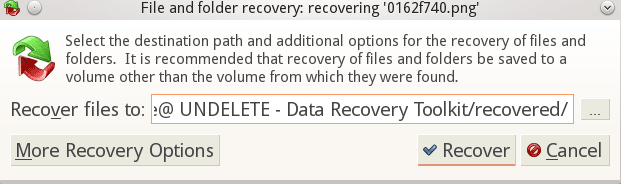
DO NOT SAVE RECOVERED DATA ONTO THE SAME DRIVE THAT CONTAINS THE LOST OR DAMAGED DATA!
When saving recovered data, you are writing records to the file table. If you write these records on the same drive that contains the damaged data, you are destroying the file table records that you are trying to recover. At the same time, you are probably destroying the file table records for other deleted entries. It is best to save recovered data on another logical, removable or network drive.
CREATE A RAW DISK IMAGE IF YOU HAVE AN EXTRA HARD DRIVE, OR OTHER LOGICAL DRIVES THAT ARE BIG ENOUGH!
A Raw Disk Image is a single file that stores all the data from your logical drive or physical device as a mirror image. Having a Raw Disk Image can be useful when you want to back up the contents of the whole drive, and restore it or work with it later. Before you start recovering deleted files, it might be a good idea to create a Raw Disk Image for the one drive, if you have enough space on another drive. If you do something wrong while recovering the files (for example, recovering them onto the same drive and destroying the data), you will be able to recover these deleted files and folders from the Raw Disk Image that you have wisely created in advance.
To find and recover deleted partitions and logical drives:
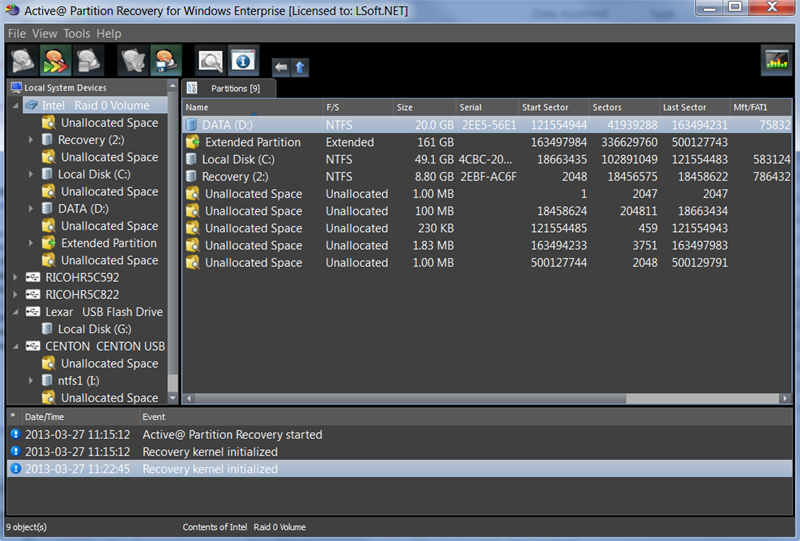
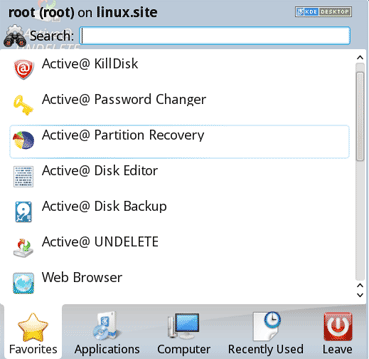
1. From the Active@ LiveCD shell, click Start > Favorites > Active@ Partition Recovery.
The Active@ Partition Recovery workspace appears with all available devices listed in a tree view under Local System Devices.

2. To scan an unallocated space, select it. Known details of the selected item are displayed in the right pane.
3. To scan the unallocated space in basic mode, do the following:
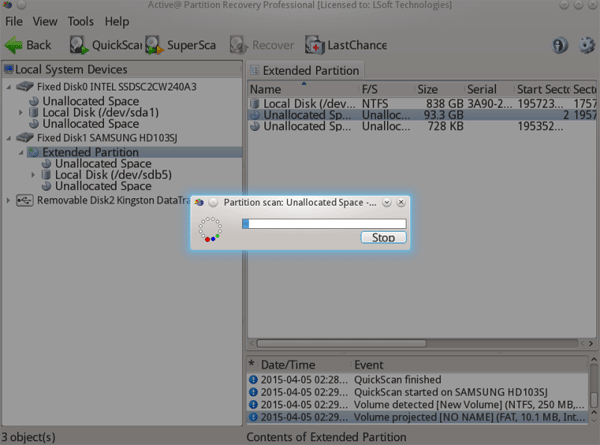 The status bar displays the progress of the scan.
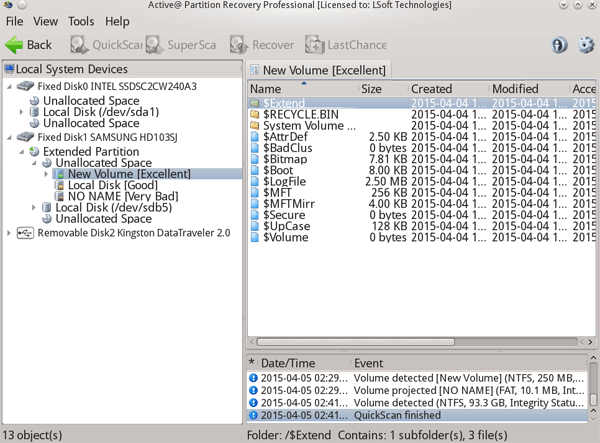
4. If you cannot see a logical drive, to process the whole surface of a disk, select it and click SuperScan and the Super Scan Options dialog box will open. Do the following:

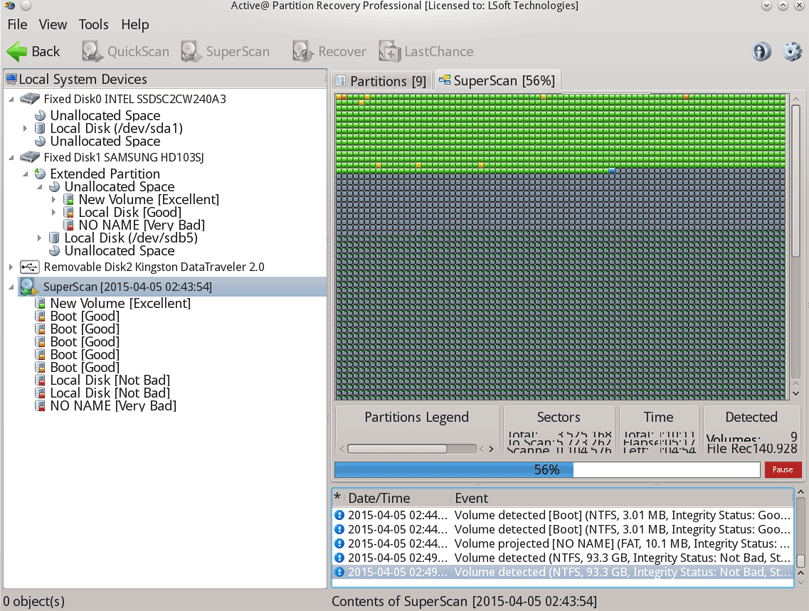
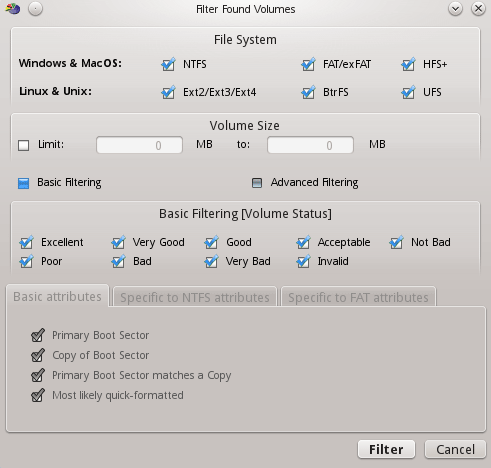
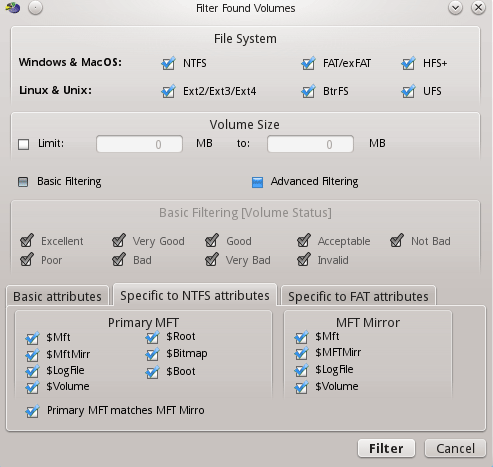
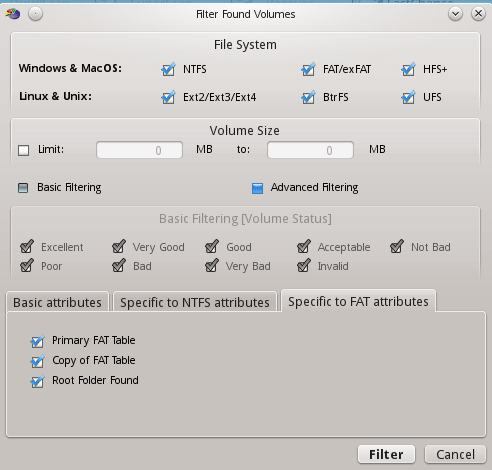
5. To display a smaller set of SuperScan results, do the following:
6. You can manage other aspects of SuperScan results:
7. To recover deleted or damaged partition select it and click Recover.
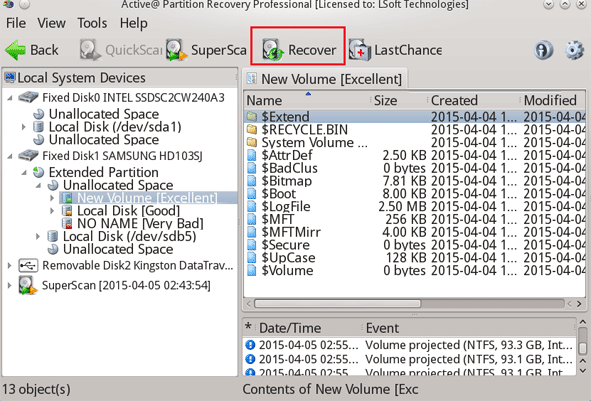
The Active@ Partition Recovery parameters dialog box will open. To specify recovery options, do the following:
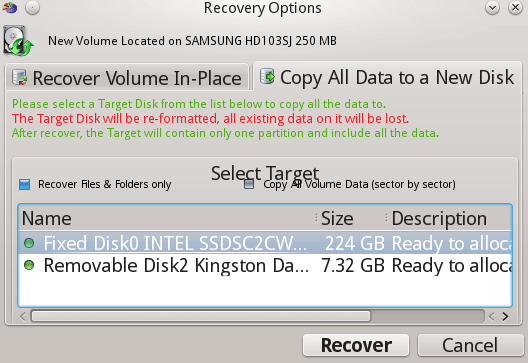
The partition is recovered at the new location.
A Raw Disk Image is a mirror copy of your entire logical drive or physical device stored as a set of files. It might be a good idea to create a Raw Disk Image for a drive containing deleted files that you want to recover, if you have enough space on the drive which you are using for recovery. If you do something wrong while attempting to recover a partition, you will be able to recover these deleted files and folders from the Raw Disk Image of that partition.
Depending on disk image creation settings, a Raw Disk Image consists of a configuration file (with an extension .DIM) and a single file chunk, or set of files having extensions .000, .001, .002 ... (each file chunk has a size of 2GB in this case).
1. In the Active@ Partition Recovery workspace, right click on a logical drive or a physical device.
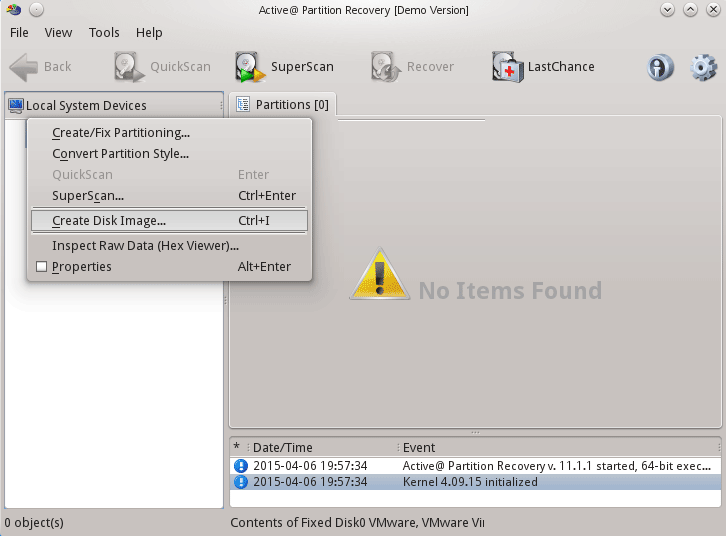
2. Choose Create Disk Image which will open the dialogue box.
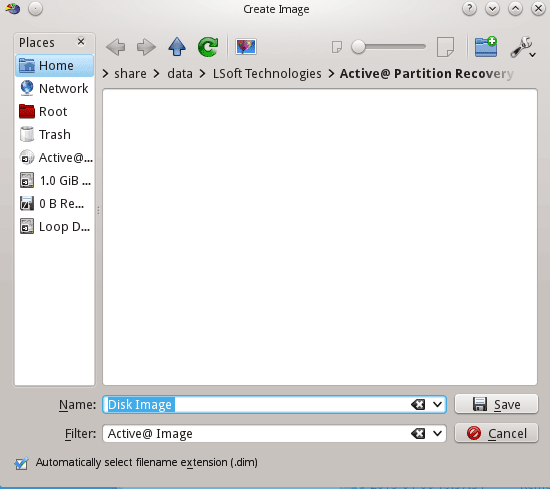
3. In the Save drop-down list, select another physical device or another logical drive.
4. Browse to the folder where you want to save the Disk Image.
5. In File Name, give the Disk Image file a descriptive name.
6. Click Save. A progress bar appears.
Watch the progress and wait while the drive's contents are copied to the new location. You can cancel the process of image creation anytime by clicking Stop.
Important! Do not save a Raw Disk Image back onto the disk that you are backing up. The target location to save the Raw Disk Image must always be another drive.
The MBR (Master Boot Record) is created when you generate the first partition on a hard disk. It is probably the most important whole data structure on the disk.
The location is always track (cylinder) 0, side (head) 0, and sector 1. The MBR contains the partition table for the disk and a small amount of executable code.
On x86-based computers, the executable code examines the Partition Table, and identifies the system partition. The MBR then finds the system partition's starting location on the disk, and loads a copy of its Partition Boot Sector into memory. The MBR then transfers execution to executable code in the Partition Boot Sector.
1. In the Active@ Partition Recovery workspace, in the Local System Devices list, select a disk.
2. From the Tools menu, choose Fix MBR (Create Typical MBR). A Warning message appears.
3. Click Yes.
The MBR is fixed.
Note! For detailed instructions, see the Active@ Partition Recovery Documentation.